Tuesday, May 31, 2011

My favorite side dish

You spell it tabouli, I spell it tabbouleh, tabouli, tabbouleh, tabouli, tabbouleh...
...let's eat the whole thing up!

I could eat tabbouleh with every meal and not get tired of it. I make it about once a month and I learned very quickly that the recipe I was using from Bon Appetit magazine wasn't nearly large enough. I doubled it. That still wasn't enough. So the last handful of times I've made this, I have quadrupled the recipe and that's just about right, if you eat it as much and as fast as we do.

Rather than using bulgur wheat, which is traditional in the popular Lebanese dish, this recipe calls for quinoa, a grain with roughly two to three times the protein as bulgur, and a good balance of amino acids. Commercially available quinoa has already been rinsed thoroughly enough to remove the bitter-tasting saponin residue that grows on the seeds, something which helps keep the birds away. I think it would be fun to try to grow quinoa, but I imagine it wouldn't like our central Texas heat. It's typically grown in South America, in the high altitude of the Andes, in countries like Bolivia and Peru.


I've already doubled the recipe for you, but if you plan to serve this at a picnic or gathering, you'll want to double it again. To make it easier on you, I've already done the math. Note*-The numbers in parentheses are the quadruple amounts. (You're welcome!)


Quinoa Tabbouleh

1/4 cup extra-virgin olive oil (1/2 cup-see note* above)

1/4 cup fresh lemon juice (1/2 cup)

1 1/4 cup chopped fresh parsley (2 1/2 cups)

1/2 cup chopped fresh mint (1 cup)

2 garlic cloves, minced (4 cloves)

2 cups water (4 cups)

1 cup quinoa (2 cups)

1 cup finely chopped cucumber, peeled and seeded (2 cups)

1 cup chopped seeded tomato (2 cups)

Optional additions: grated carrot, diced celery, bell pepper, jicama, etc. I usually keep these to a minimum, but I do like the addition of colorful orange flecks of carrot or yellow bell pepper, though they are NOT traditional in tabbouleh.


Instructions: Bring water to a boil in heavy medium saucepan. Add quinoa, cover, reduce heat to low, and cook for 13 minutes. When done, remove from pan, tossing in a large bowl. Fluff with fork periodically while cooling completely. (This part is important. Allow enough time for the cooling step, because if you mix everything up while the quinoa is hot, it'll make the vegetable lose their crunch and mess up the texture.) While the quinoa is cooling, mix the olive oil, lemon juice, garlic, parsley, and mint together in a separate large bowl.


Next, chop the cucumber, tomato, and any other optional vegetables you want, and add them to the olive oil mixture. Last, add in the quinoa and add salt and pepper to taste, mixing well. Serve either chilled or at room temperature.
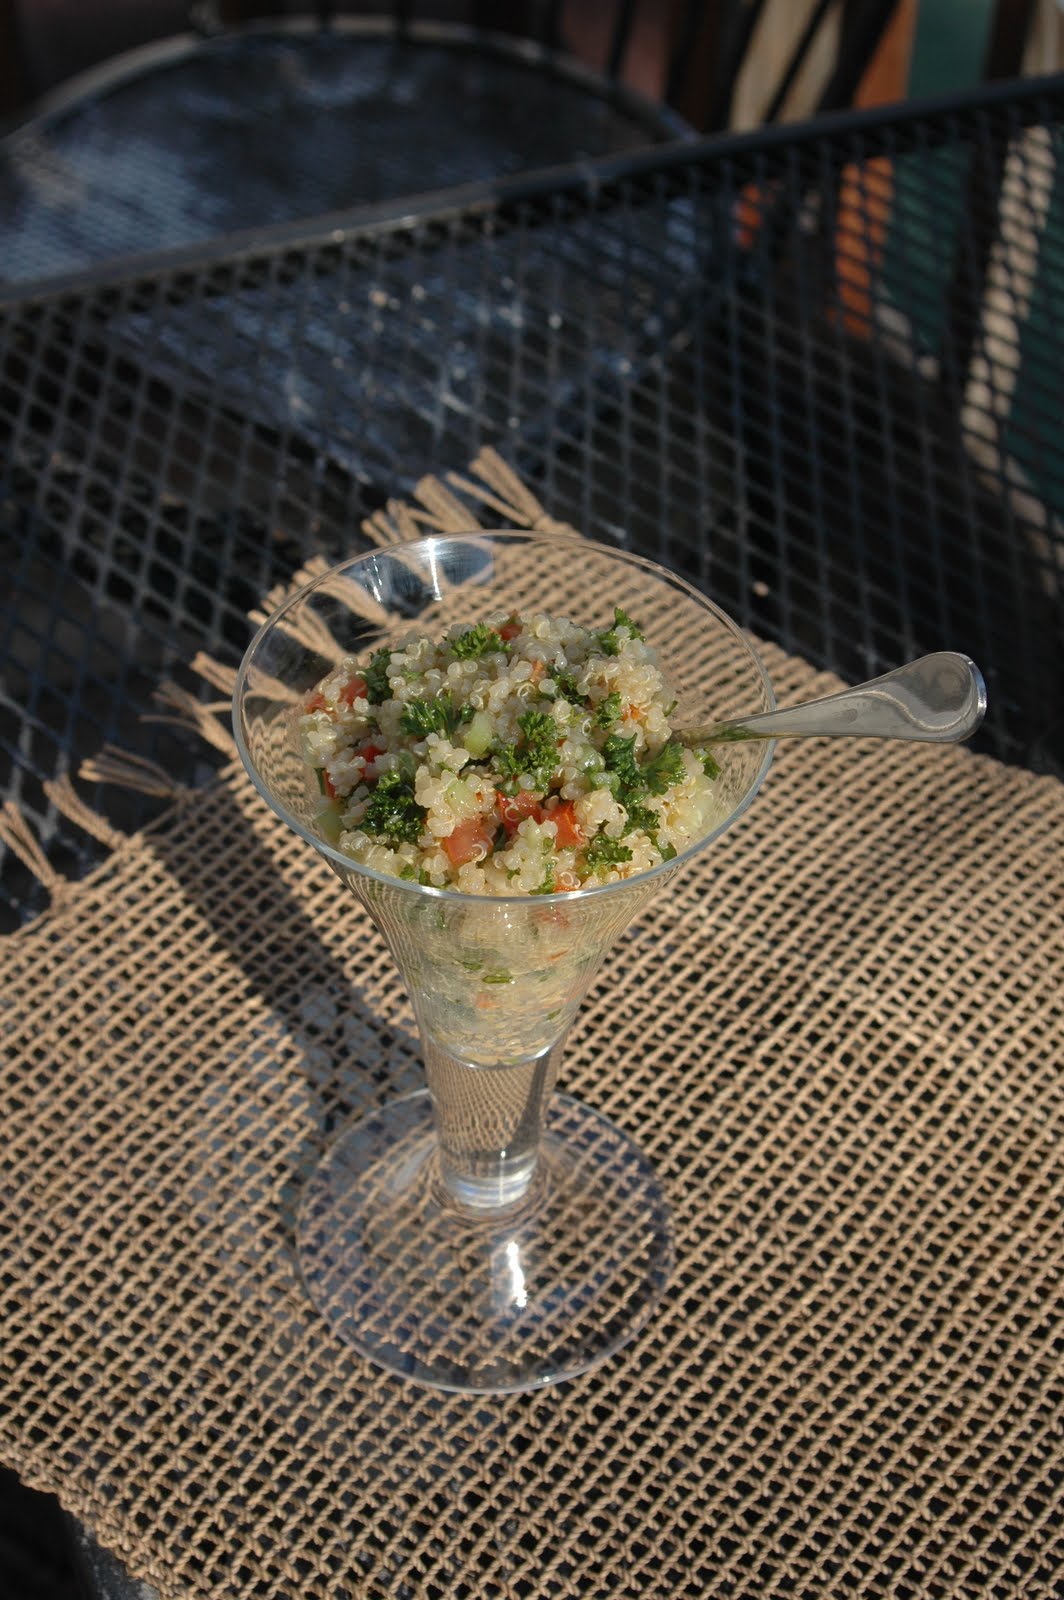


Enjoy!

Wednesday, April 13, 2011

I'm a bad blogger!

I haven't posted anything in two whole months! So yeah, I suck! I've been so busy, but not much of it has been creative. I didn't feel it was worth sharing, but the time has come to at least check in, right?

In a nut shell, I've been pecking away at the shed we started building last fall. (I'll show you some other time.) We had been putting up with the inconvenience of not having a door all this time, using a piece of siding board to cover the opening, propped up with chairs and a ladder. Sheesh! It also needs insulation, interior wall board, wiring... you know, lights, outlets, the works. So that's happening simultaneously with the start of the 2011 garden. That's the other major push right now. Also there are little pieces of art beginning to evolve (the TAC 5x5 show in at the beginning of May, and I'm unsure of what to enter, so I'm making several), and I was knitting a few scarves back when it was a tad cooler, though that seems so long ago. And, do you remember the garden gate I started ages ago? I am a few steps farther along with that... so it looks like there are a lot of reports looming on the horizon. For now though, how about some garden news?

Last year, I let the garden go, and basically turned it over to the fire ants. It was insane.. and I sure paid the price for that move at the beginning of this season. This is what the garden space looked like only a couple of months ago...


You can't tell it from this photo, but much of it was over knee deep. There was no way this was going to get tilled, being primarily 'devil' grass. It sends off the nastiest runners, and it's above-ground stems are almost impervious to the rototiller blades. After much consideration, we decided the only thing we could do was burn it all off. We waited for a calm day and lit a match to the whole 5750 square feet of it, which worked perfectly. We were lucky to have a short window of opportunity without a burn ban in effect. So where we once had a dried brush field... Poof!


Before...


...and after burning, and tilling, and a bunch of 'hands-and-knees' work, pulling devil roots!...


Even these photos are older, as now there are beds starting to evolve, some looking rather lush.


After a few more days of 'shed work', I'll get back in the garden and capture more photos of real things growing!


See you soon!

Friday, February 11, 2011

Egg Scramble

I'm sure no one cares about this wall, newly covered in sheetrock. I'm getting sick of it myself. This is only the first coat of mud, applied to the screw holes and over the tape, along the joints. It will get at least two more coats of mud with at least a day to dry in between each coat. It's so boring, I don't even want to work on it. Instead, I made eggs.

I haven't been cooking much at all lately. We've been surviving on coffee, soup, peanut butter and jelly, whatever is fairly instant. This morning, however, I woke up in the mood to have a filling breakfast so I whipped up one of my hearty egg scrambles. (Not that I consider this any kind of elaborate cooking.) This one turned out more decadent than most, due to the addition of some cream cheese. Every time I make an egg scramble, it turns out differently, depending on what ingredients I have on hands. So this 'recipe' can be altered in a number of ways to suit your taste or fridge contents. For that reason, I am not very specific with my measurements and quantities.

Egg Scramble
(serves 2)
1 Tablespoon coconut oil or other oil for frying
1/2 cup diced onions
handful of diced red bell pepper
a bit of diced jalapenos
a clove or two of garlic, minced
1/2 teaspoon cilantro chutney
a few chopped green olives (about 8)
4 large eggs, whisked
heaping Tablespoon of cream cheese
1/2 cup canned black beans
2 Tablespoons minced fresh parsley
salt and pepper to taste
dollop of salsa
grated parmesan cheese

Instructions: Heat oil in large skillet. Add onions and simmer until they start to brown. Add the next 5 ingredients and simmer a few minutes.


Meanwhile, soften the cream cheese in the microwave and incorporate it into the whisked eggs. Add to skillet, stirring it into the other ingredients. Add the beans.


Be sure to rinse the beans or the drab colored juice will make the whole dish an unappetizing color. It will still taste good, but... just rinse them please!


Add the parsley, salt and pepper and incorporate everything well. Plate the portions, topping with salsa and a sprinkling of parmesan cheese.


Enjoy!

Tuesday, February 8, 2011

Six more weeks!

In the midst of enjoying the Super Bowl and watching blizzards (well, from afar!), planning a garden, and knitting scarves, I didn't forget that we had another very important holiday last week... Groundhog Day! We like to celebrate the event by getting together with family, watching the Bill Murray movie of the same name, and having foods that relate to the movie as well. So last Wednesday night we enjoyed donuts/pastries, rocky road ice cream, sweet vermouth on the rocks with a twist... you get the idea.

Now I'm feeling a little bit like a groundhog on a sunny day, because I have about six more weeks of work left on this bedroom and bathroom overhaul. That's partly because I work very slowly, and always seem to have other interruptions.

I decided to paint the pocket door, rather than stain it. Well, I'll admit that I tried staining it first, and did a lousy job, using water-based stain. I think it must be impossible to put down a coat of that kind of quick-drying stain on the whole door in the small amount of time you have before you have to wipe off the excess. So mine dried before I could tend to it and became very streaky. Also, working in smaller sections didn't pan out too well either, as each 'line' where I left off was noticeable. So I quickly decided I could be alright with having a 'Spalding Gray' painted door on the bedroom side and 'Montpelier Ashlar Grey' on the bathroom side. The trim is getting stained though, as I am confident I can work that small of an area in time. So the lesson I've learned is that I will have to go ahead and purchase oil-based stains for larger projects in the future and deal with the turpentine for clean-up. OOOORRRRR, use disposable foam brushes and rags, and throw them all away when I'm done.

Here are the latest (limited) views of the new wall:

I just happened to have the green mold/moisture resistant sheetrock on hands, so that's what I used. This is a shared wall between a bathroom and bedroom, so it's more important to have it on the bathroom side. But we intend to have a water feature in the bedroom eventually too. Obviously, I haven't done the taping and mudding yet. I've never done this before, so I'm in for another learning experience tomorrow.

Last week, I also learned how to do very basic electrical wiring. I installed 4 new outlets (one of them GFCI) and a double switch (single pole) to operate two of those outlets. Notice the outlet up high by the ceiling. That's to feed power to the crown moulding/rope lighting effect we want to install around the ceiling someday. The other part of the switch powers an outlet down towards the floor that will be used by the water feature (that I still have to make!) But while the wall was open, that was the time to plan for these things and get the juice in place!

This is the door panel I built to hide the shower controls from the other side of the wall. Of course, it needs sanding and painting still. We'll probably never have to access it, but nevertheless, I wanted it to look better than the old panel that was crudely screwed onto the wall I removed. This has a fun little magnetic latch that opens when you push it once, and then closes when you push it again.


So, it seems like very little progress for the amount of time that has passed. But the important thing is that I am doing something everyday. It's a lot of fun to learn new things and watch something like this evolve.

Monday, January 24, 2011

Just plain work!

I wish I could say I've been creative lately, but instead, I've been doing hard labor! It's been a lot of careful measuring and precision cutting of 2x4s. I tore out most of a wall in my bedroom that separates it from the bathroom and closet. It wasn't a load bearing wall, so I had no worries of collapsing the house. It all started with a mattress! Yep, that's right. We got rid of our old queen sized mattress and purchased a California-King sized Tempur-Pedic mattress. It didn't fit in our bedroom as well, so it was necessary to change some other things around. We have been wanting to make some improvements in this room for awhile now, and since I had already planned on replacing drywall, I figured that we could swap out the swinging/hinged door to the bathroom and install a pocket door while we have the wall opened up. That should free up about 10 square feet of space, the amount of arc that a regular door needs to open completely.


First, I removed the old sheetrock, which had a lot of flaws and irregularities. Then I found that many of the studs were not in the right places. No wonder the previous drywall installers didn't hit the studs half the time! I have now removed all the unwanted studs, added more (correctly, on 16" center, and plumb, I might add), then fitted the pocket door in place.

This is what the pocket door looks like before the drywall covers the framework. And as you can see, I have jumped the gun a little and mounted the door before staining it. I just wanted to make sure it was going to install right.

So there's lots of hard work left to do. My reward, after this wall is finished, is to texure another wall of this same bedroom. But I have to complete this wall first, so I'll be updating as it happens. I like starting a project that is messed up and ugly to begin with, because the before and after difference is extreme, making me look like a genious! When I get to move on to the interesting textured wall, I'll be using a tissue paper technique, rich brown paint, and glaze highlights. I've never done a process like this before, but I'm thinking it will be a whole lot more fun. That's the kind of project that doesn't feel like work!

Tuesday, January 4, 2011

$$$

Have you purchased truffles lately? Not the chocolate kind, but the edible subterranean fungus. Truffles are neck and neck with the price of silver, which today, just happens to have dropped to $28 per ounce after having recently hit $30.


So, as you can imagine, this ingredient isn't one to be taken lightly or squandered in any way. I have eaten truffles in egg dishes and on pasta, but my favorite use of the truffle is to incorporate it with brie cheese in a pastry. Calling what I'm about to share a 'recipe' is an overstatement. All you really need are guidelines to create your own impressive appetizer.

The short version is: slice a brie round horizontally in half, spread your choice of filling, replace top, wrap in thawed puff pasty, bake. Nothing to it. I chose to use truffles in my filling, but the beauty of this is that you can insert whatever ingredients you like. Typically, you would use one or two large brie rounds. However, I found some personal sized, mini brie rounds and thought they would be easier to share at a party.

For the filling, carmelize about half a small onion, minced, in a tablespoon of unsalted butter. Let it drain on a paper towel.


Mix onion with a couple tablespoons of softened cream cheese and about a half an ounce of black truffle, minced finely.


I am using Oregon Black Truffles from Alpine Harvest that I purchased at Whole Foods.
Spread the filling in between the brie pieces, fitting them back together like sandwiches.

I used about a heaping teaspoon of pastry on each piece of brie. This quantity of filling should be adequate for one 5-6 inch brie round or about 9 or 10 small ones like I've made here.

Place each brie on a circle of softened puff pastry, large enough to come up the sides of the brie where it can be pinched to another smaller round of pastry dough placed on top. This creates a 'seam' all around the top edge. I pinched and re-pinched this seam, as I've had it split open in the past. A little beaten raw egg helps it stick together, though too much and it gets slippery and doesn't hold. This time, I also inverted the pastries when baking, tucking the seam somewhat underneath. At this point, you can decorate it with scraps of pastry dough, or leave it plain. Brush all the top areas with beaten egg, being careful not to let egg touch the sides of any cutouts. Egg would 'glue' them tight and prevent them from expanding and puffing as they should. Bake at 425 degrees for 20 minutes or until golden brown. (I usually bake on a Silpat sheet or line the baking sheet with foil for these.) Let sit about 10-15 minutes after removing from oven. Set them out with crackers, toasted baguette pieces, or just by themselves.

If you serve these at your next dinner party, you're bound to get rave reviews.

You can bank on it!


Sunday, December 26, 2010

Dare I say 'resolution'?

I don't know if it's smart to utter the words 'New Year's Resolution' in the same sentence as 'post more frequent blogs', but there... I've said it! Actually, I'm not going to be quite that specific. I just intend to get rid of the chaos in my life (translation: 'house') and strive for organization, space-saving solutions, and timely schedules. That should help me stay on track and keep up with my housework, my projects, AND my blog.

I've been saying I'm in the process of remodelling the house for quite some time. But when you tear out a wall, or rip off some old sheet rock, but don't go any farther with the project, it's not really remodelling at all. It's 'DE-modelling'! Now, on the brink of actually RE-placing said sheet rock and new walls, I am invigorated and hopeful that this will all lead to much needed improvement in our home.

But on a lighter note, (if you consider zombies light), I can now post about my latest art project. My stepdaughter, Krista, and I made a batch of wine for my husband for Christmas. With the help of the fine folks at 'Water 2 Wine' in Austin, we put together a vat of 'Italian Amarone Especiale'.

Here we are, weeks earlier, mixing up the brew.

Then the Saturday before Christmas, we were able to bottle up our concoction,

put in the corks,

seal the top with foil- sort of a shrink wrap method,

and apply our label. THAT was the fun part.

My husband is one of the biggest zombie fans EVER, so I came up with a theme that he went nuts over. I wanted to draw a portrait of him as a zombie for the wine label and I was worried about getting an appropriate photo of him without giving anything away. Then on Halloween night, as he was watching 'all things zombie' on tv, he looked up and made several zombie poses while I snapped the camera (I just happened to have it handy!) I was able to render the face using watercolors, graphite pencils, and Prismacolor sticks. Again, with the help of Krista, we added type, special effects, borders, and backgrounds and came up with this label:

Hand-cutting around the two drips at the bottom of the label was the worst part, but after an hour or so, we had all thirty labels cut and applied to the bottles, and felt it was well worth the effort. During the label design process, we had to work separate from each other, so it was necessary to communicate through instant messaging, texting and emails. It was a slow process to work out the kinks, but we finally got there. Thank you Krista for such a huge effort and the upbeat willingness to be tortured and nit picked! And as a result of this wine's overwhelmingly positive reception, we may be producing future themed wines. (Scab-salve, 'They're coming to get you Barbera', Cadavernet...) Ahhh, ideas for future batches are brewing... So let me pour an 'undead red', raise my glass, and toast to a very happy and fruitful year ahead!